 » Site
Navigation
 |
|
»
»
»
» Motorcycle Forums
|
 » Our
Partners
 |
|
| |
 |
|
 |
 03-27-2012, 12:05 PM
 |
#1 (permalink)
|
|
Shake~N~Bake
Join Date: Jun 2008
Location: USA
Posts: 21,345
|
Rebuilding a Keihin CV40 carb
Rebuilding your CV40 carb isn't rocket
science. It's simply a matter of taking the carb apart, cleaning
items that are prone to poor performance if exposed to dirt for
decades and rejetting it properly upon reassembly. Float adjustment
only has to be set of it's messed with, you hit the float and bend
the tab, or the platic float develops a leak and becomes heavy. One
other reason would be is if the needle were bad and needed to be
replaced, and in this case, that happened. Start with your typical,
CV40 carb. The Keihin CV40 was introduced in 1988 on the XL models,
however did not originally have an accelerator pump. 1989 to 2006
models did. This is your typical CV40 carb. This model is a 1992.
(Special thanks to LilJo!!)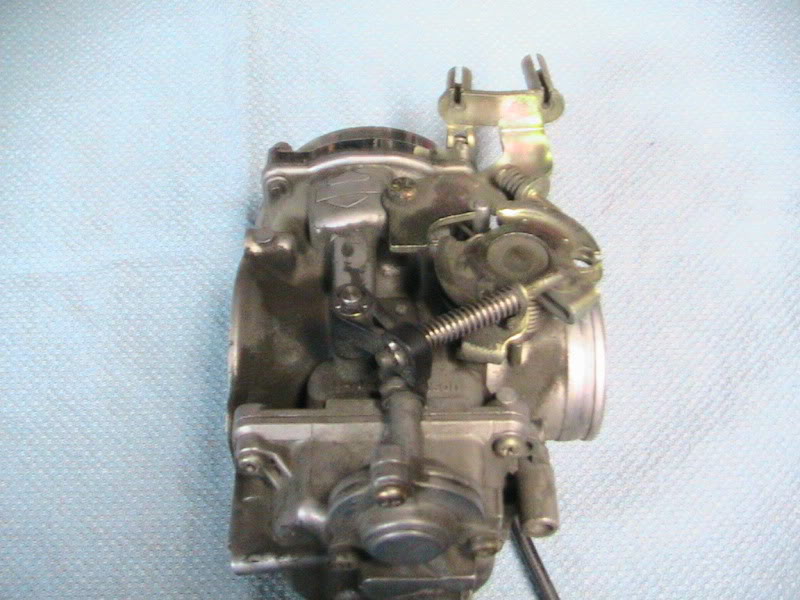 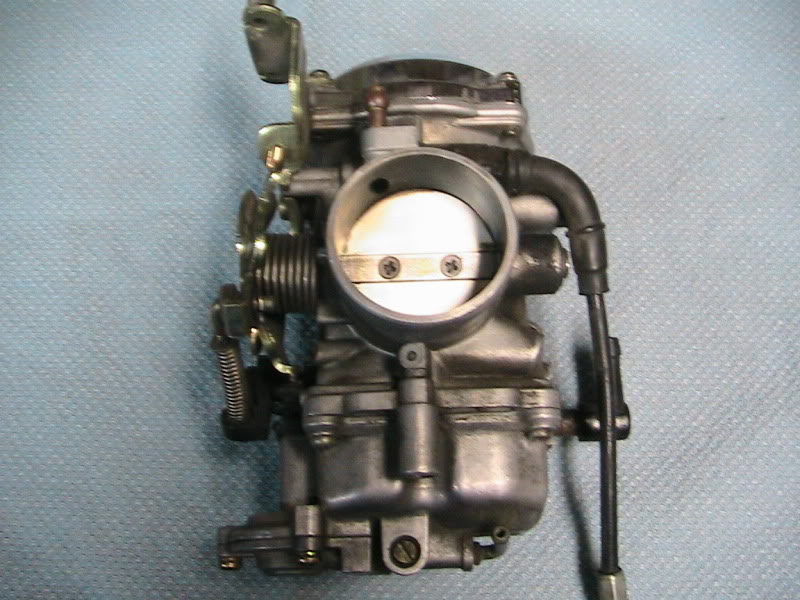 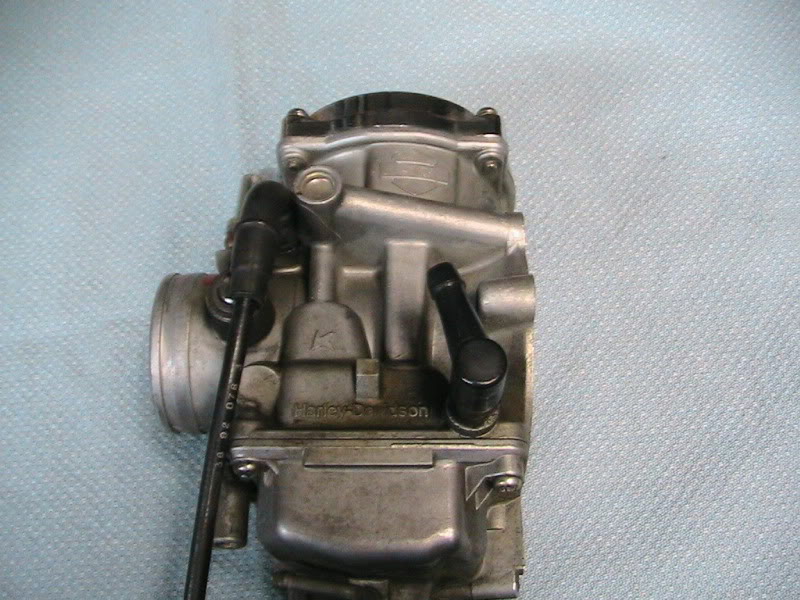 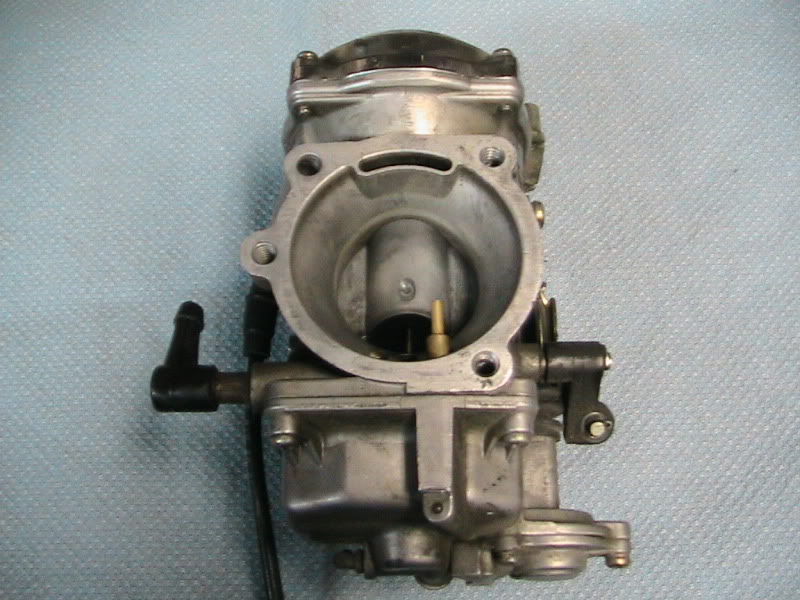 Tools
needed will be: 1.) Medium straight blade screwdriver 2.)
Medium phillips screwdriver 3.) Small straight blade screw
driver 4.) 8mm wrench 5.) pick 6.) can carb cleaner (2+2 is
my favorite flavor) 7.) Thread lock red (For fuel elbow
replacement only.) 8.) 9/16" wrench 9.) fuel elbow removal
tool, or a vice, if replacing the fuel elbow. When you take
the bowl off, you'll see the flat, main jet, pilot jet and needle in
place. The seam of the float should be about level with the side of
the carb casting, or just a tad below it. NOTE ARROW AT
LEFT OF LEFT FLOAT PIN TOWER. YOU NEED TO PRESS THE PIN TO THE
RIGHT. IF NOT, YOU'LL BREAK THE TOWER, AND THE CARB IS JUNK!!
You can just see the little arrow, pointing to the right, cast into
the carb body. 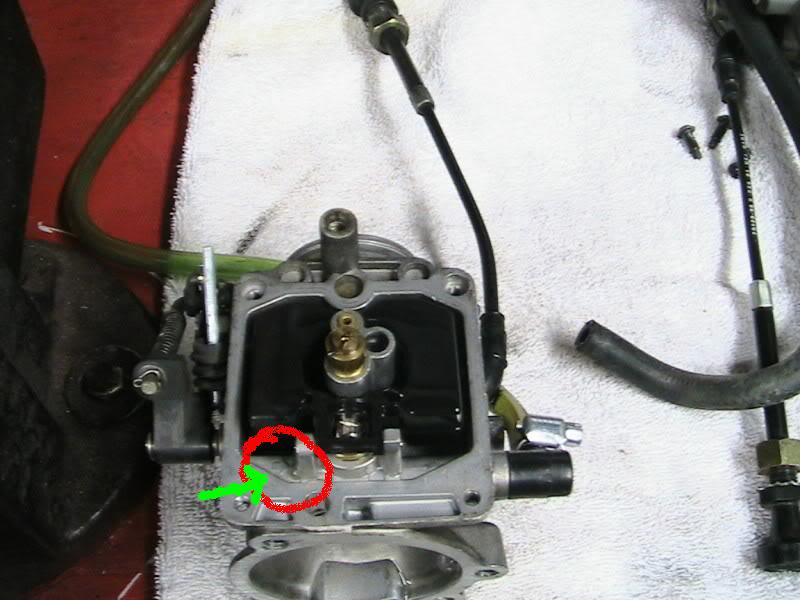 Remove
your jets using a good screwdriver, and the appropriate size. If
not, you can strip them (Brass is soft) and then you have
issues.  Not
the larger one is the MAIN JET still screwed into the EMULSION TUBE.
The smaller jet is your PILOT JET. 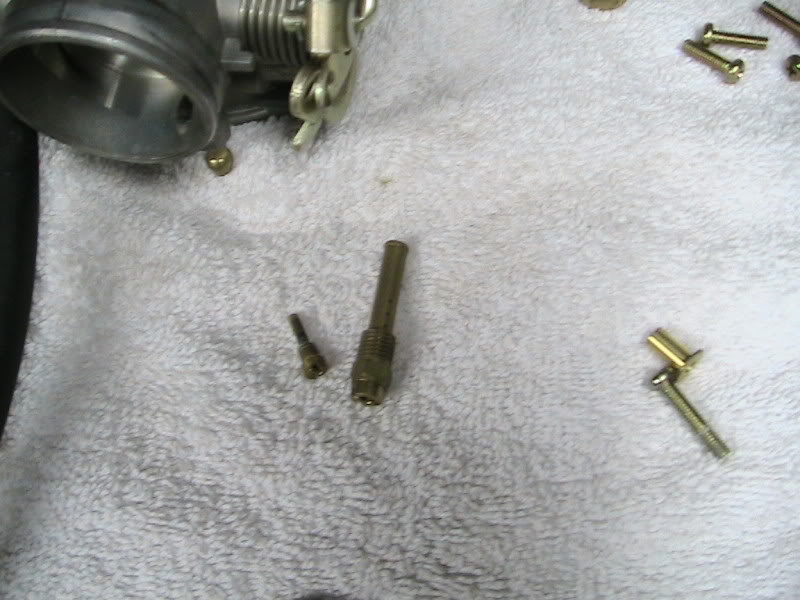
__________________
__________________________________________
I
was born unlucky. My luck is so bad, if it was raining titties, I'd
get hit by a dick. ~ElGuapo~
2005
FLHTCI
Dice valve stem caps (gold), surely adding 10+
hps.
10 year A.M.A. member.
3 year PA ABATE
member.
RIP Rick Massey: AKA-Rubberdown. Godspeed, 02-02-12.
Last edited by Dave63; 03-27-2012 at 01:48
PM. |

|

|
 03-27-2012, 12:10 PM
 |
#2 (permalink)
|
|
Shake~N~Bake
Join Date: Jun 2008
Location: USA
Posts: 21,345
|
Disassemble your carb, piece by piece,
laying your parts out on a clean, open working area. If you lay them
out in the order they cam off the carb, you'll have no issues with
putting them back in, in the correct order. 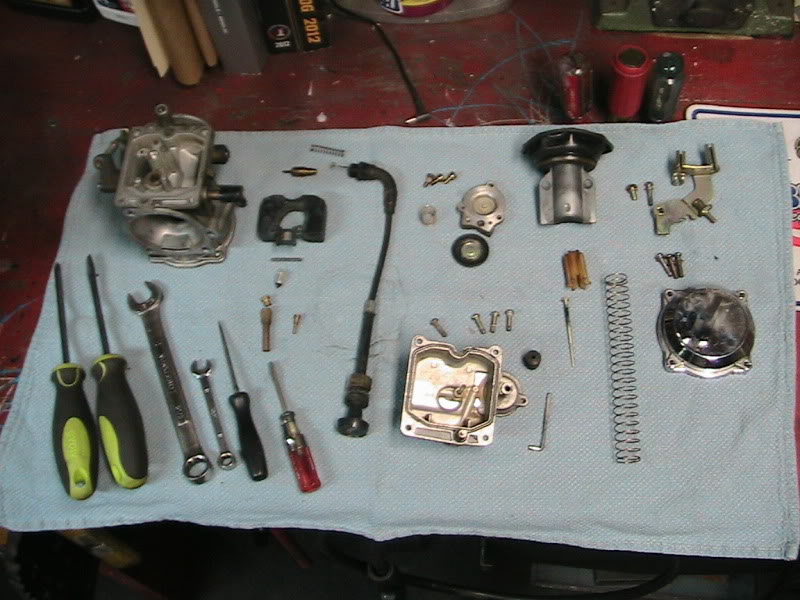 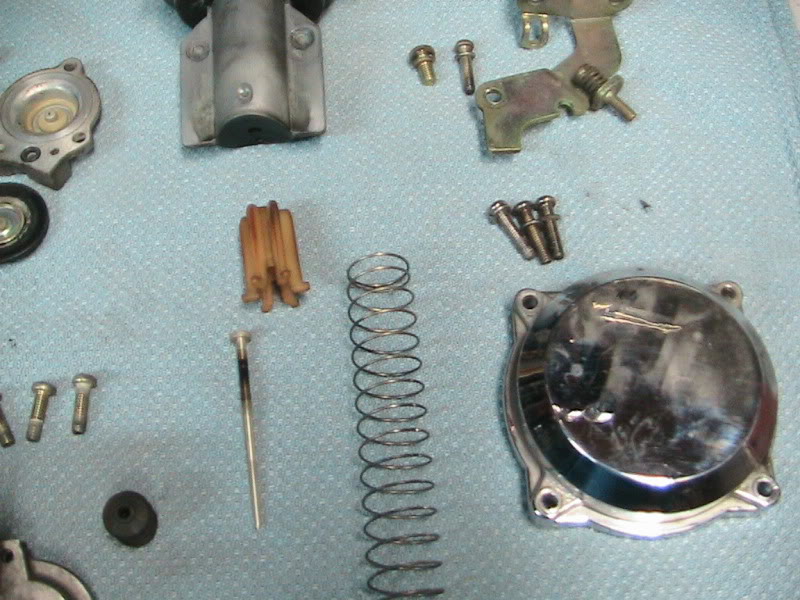 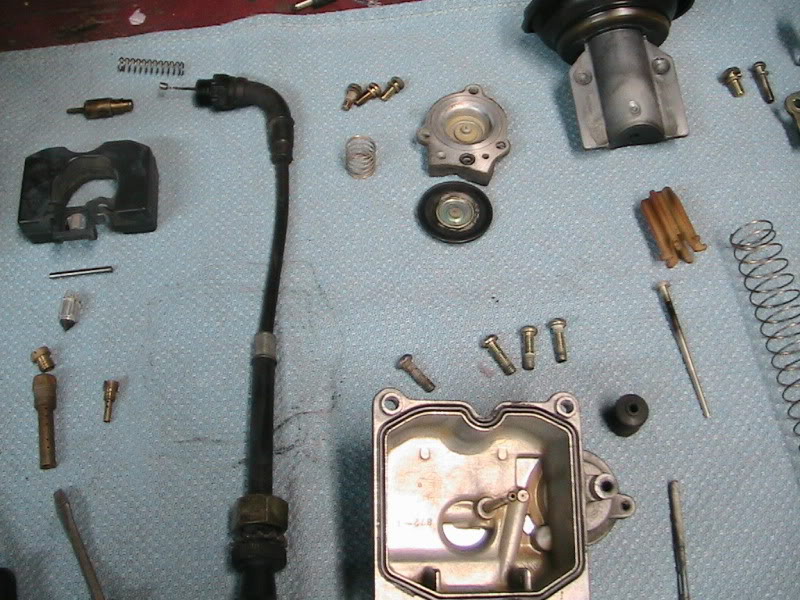 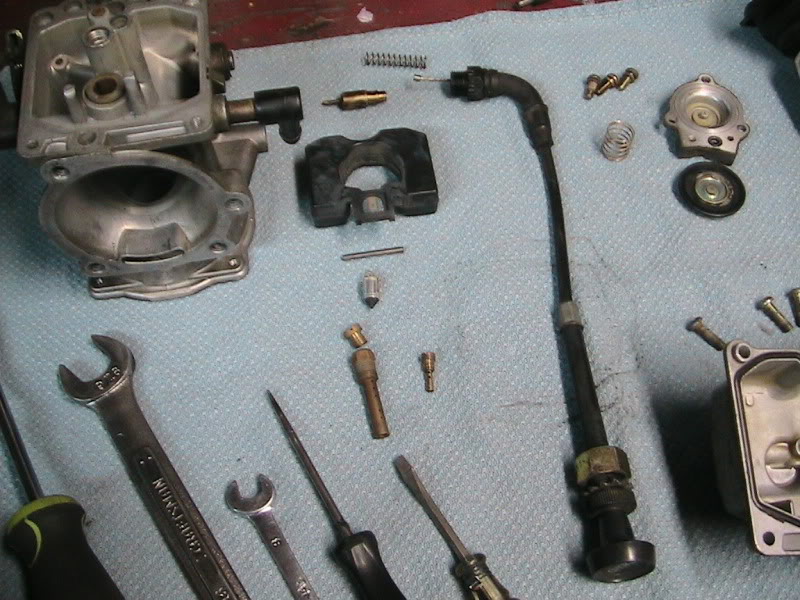 Once
done, you'll have a smaller carb body, that needs to be thoroughly
cleaned, insode and out, making sure to pass air through all the air
bleeds and ports. Remove everyting, including the main jet, pilot
jet, emulsion tube (main jet scews into it) and the diaphram and
associated parts. Clean the body and bowl with carb cleaner
and a tooth brush. I use a series of brass and mild steel brushes.
Afterwards, I have a polishing process I developed, that's fast and
efficient, making the carb look like new again. 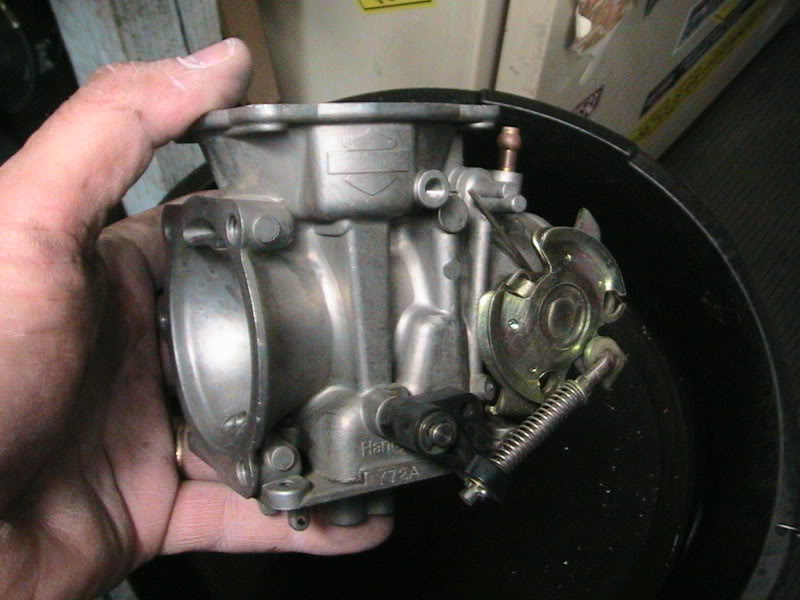 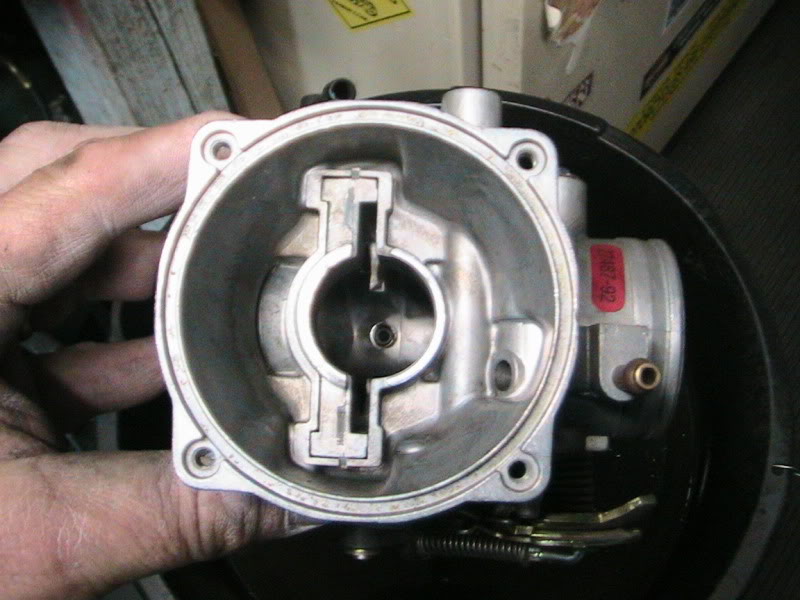 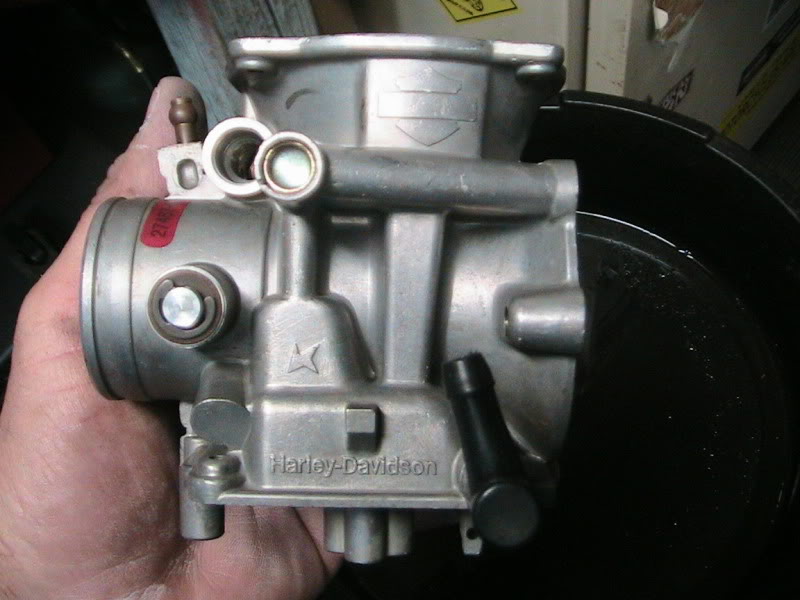
__________________
__________________________________________
I
was born unlucky. My luck is so bad, if it was raining titties, I'd
get hit by a dick. ~ElGuapo~
2005
FLHTCI
Dice valve stem caps (gold), surely adding 10+
hps.
10 year A.M.A. member.
3 year PA ABATE
member.
RIP Rick Massey: AKA-Rubberdown. Godspeed, 02-02-12.
|

|

|
 03-27-2012, 12:16 PM
 |
#3 (permalink)
|
|
Shake~N~Bake
Join Date: Jun 2008
Location: USA
Posts: 21,345
|
One thing you may want to do, is to
remove the air fuel mixture screw, and clean and inspect the tip. In
the screw passage, there's a brass needle screw, a spring, an o-ring
and a washer. Note the order they came out in. Note if there's any
damage to the screw as it's thin and fragile. Clean screw and
replace all removed parts in the order they were removed. Kits for
rebuilding will come with a new o-ring. Replace it if
removed. 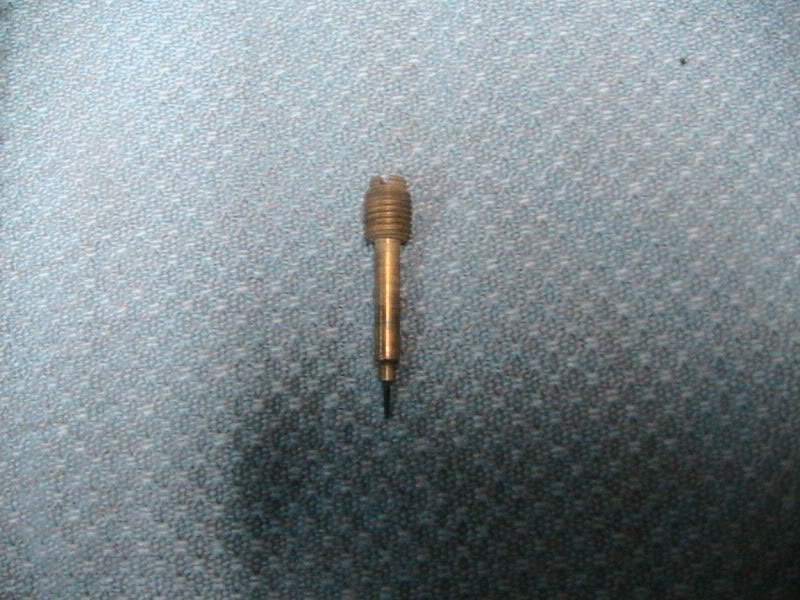 Remove
the "choke" cable. It is removed by turning the plastic 9/16" nut
that threads into the carb body. The brass pintle on the end is what
is moved within the passage when you pull the knob, with the thin
needle end allowing more fuel to enter the carb, and the wider brass
part allowing for more air. That's why this isn't a "choke", rather
an ENRICHENER. It adds fuel, not cuts off air the supply (butterfly)
making the mixture richer. Make sure to clean the enrichener
port out well with carb cleaner, and clean the pintle well,
also. 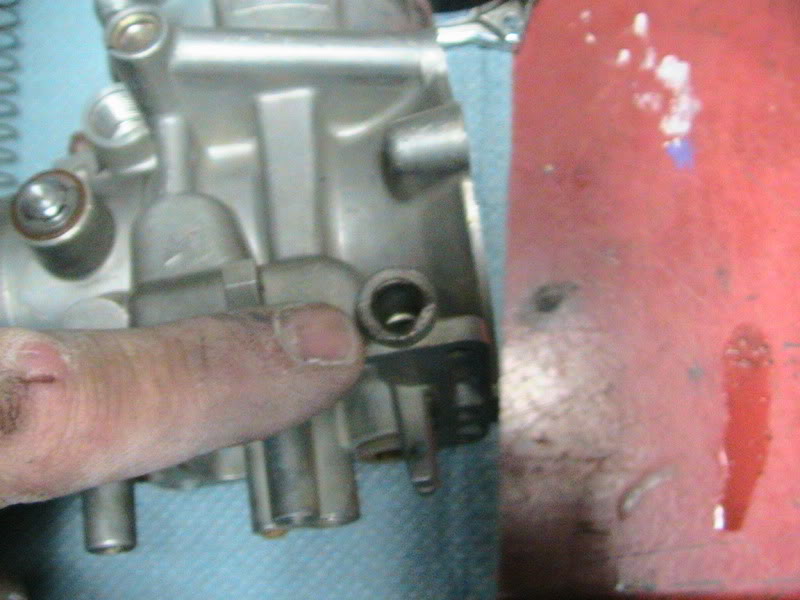
__________________
__________________________________________
I
was born unlucky. My luck is so bad, if it was raining titties, I'd
get hit by a dick. ~ElGuapo~
2005
FLHTCI
Dice valve stem caps (gold), surely adding 10+
hps.
10 year A.M.A. member.
3 year PA ABATE
member.
RIP Rick Massey: AKA-Rubberdown. Godspeed, 02-02-12.
|

|

|
 03-27-2012, 12:26 PM
 |
#4 (permalink)
|
|
Shake~N~Bake
Join Date: Jun 2008
Location: USA
Posts: 21,345
|
Once the carb body and bowl are cleaned
and polished, and the carb throat is polished, I'm ready to
reassemble. In the case of this carb, the fuel inlet was plastic.
This needs to be replaced. The old elbow id removed and a
CV-Performance brass elbow is put in its place. Refer to the STICKY
on elbow replacement. 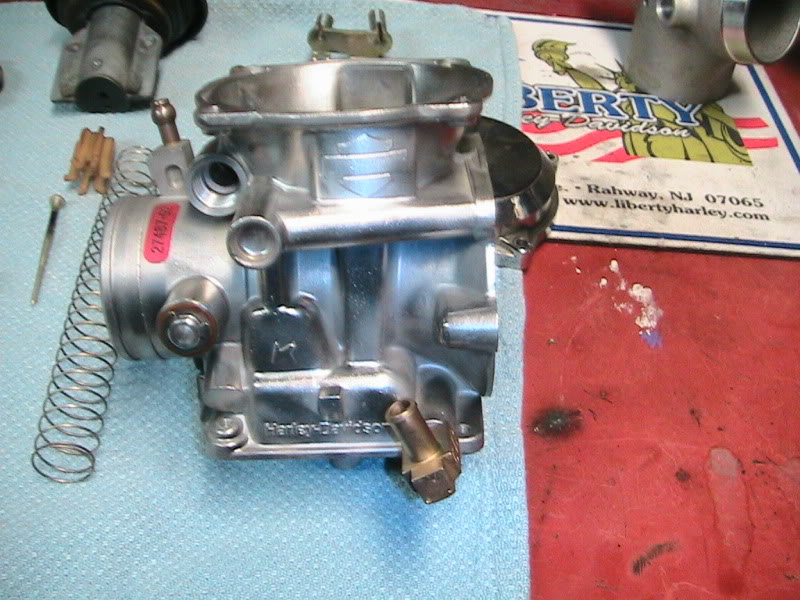 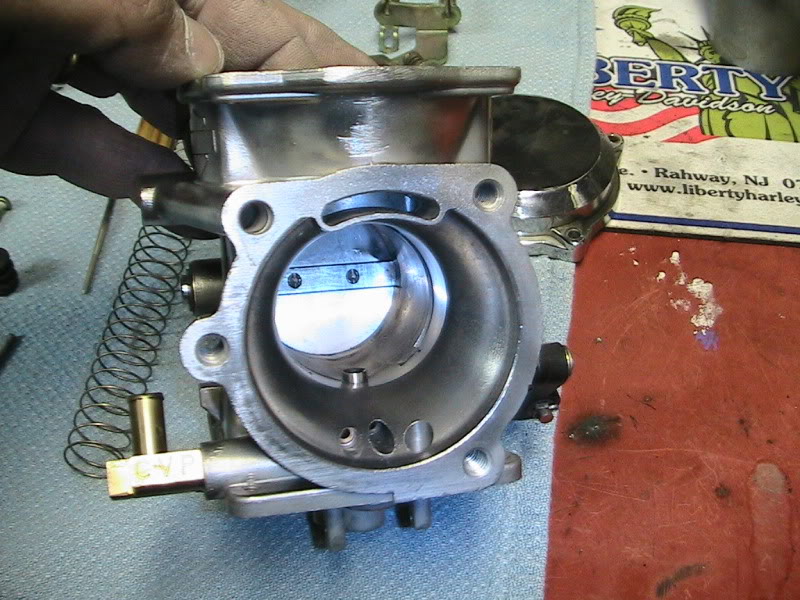 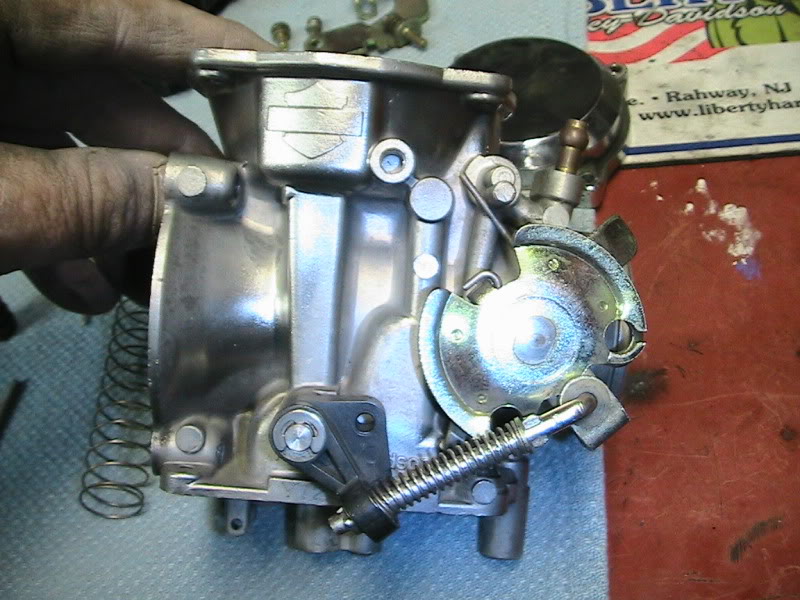 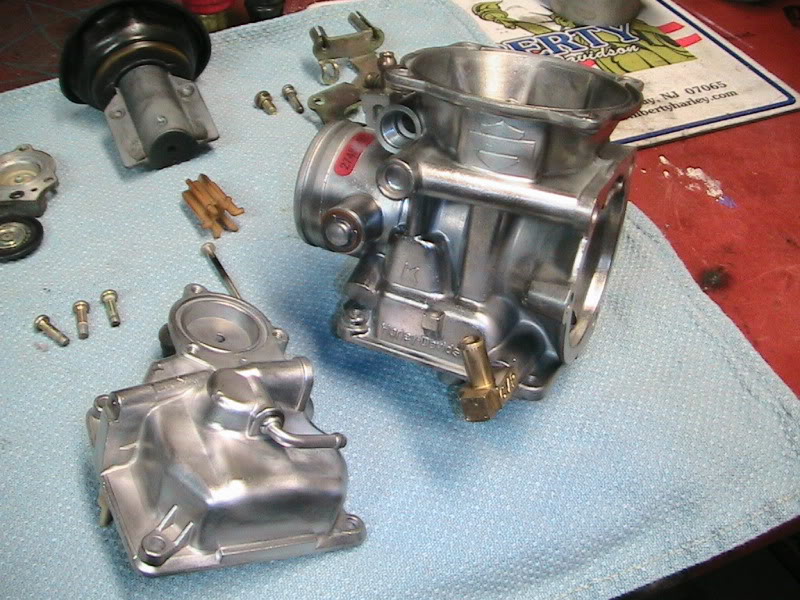 The
accelerator pump 3-screw cover is removed and the diaphram is
inspected. Keep in mind that the diaphram can delaminate and peel
apart. If you see this, regardless of being only one side, then
replace it. There's a small o-ring in between the cover and the carb
bowl that needs to be replaced when removed. In this case, I also
replaced the hardware.   The
emulsion tube, main jet, pilot jet, needle and float are replaced.
Keep in mind, when removing the float pin, THE PIN IS REMOVED FROM
THE LEFT TO THE RIGHT, IF THE PIN TOWERS ARE FACING YOU AND THE
FLOAT IS FACING AWAY FROM YOU. If you try to force it the other way,
you'll break a tower and the carb is now JUNK. There's an ARROW
pointing towards the way the pin is to be removed. Once all
parts are installed, replace the bowl, accel pump bellows, accel
pump actuator shaft and 4 screws. 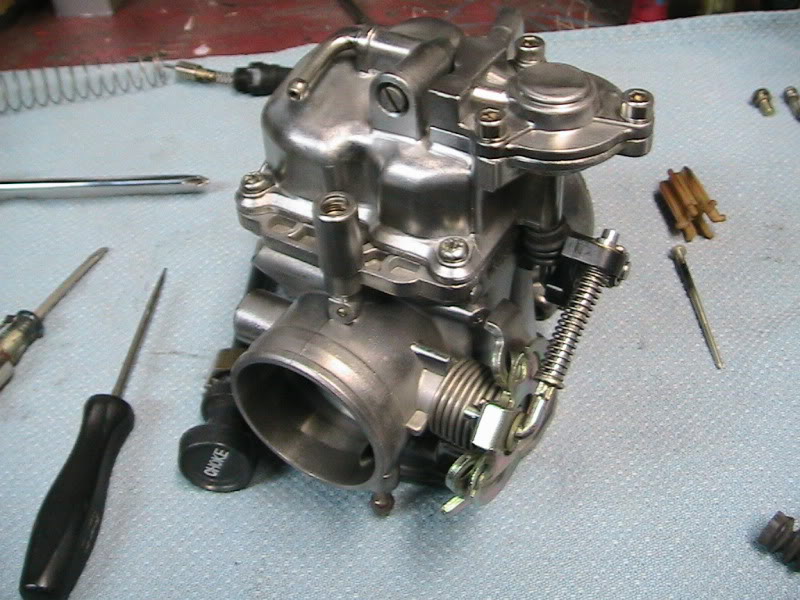
__________________
__________________________________________
I
was born unlucky. My luck is so bad, if it was raining titties, I'd
get hit by a dick. ~ElGuapo~
2005
FLHTCI
Dice valve stem caps (gold), surely adding 10+
hps.
10 year A.M.A. member.
3 year PA ABATE
member.
RIP Rick Massey: AKA-Rubberdown. Godspeed, 02-02-12.
|

|

|
 03-27-2012, 12:31 PM
 |
#5 (permalink)
|
|
Shake~N~Bake
Join Date: Jun 2008
Location: USA
Posts: 21,345
|
Replace the slide and diaphram. I polish
the slide, and bevel the leading edge for better air flow. Make sure
on reinstall, the lip of the diaphram fits into the upper housing
groove, or you'll tear it and it'll leak. It's a $60 part. Keep that
in mind. As the cover is placed on it, you can push the rubber end
back into the groove with a small screwdriver. As the lip seats,
you'll see the cover meet the carb housing. 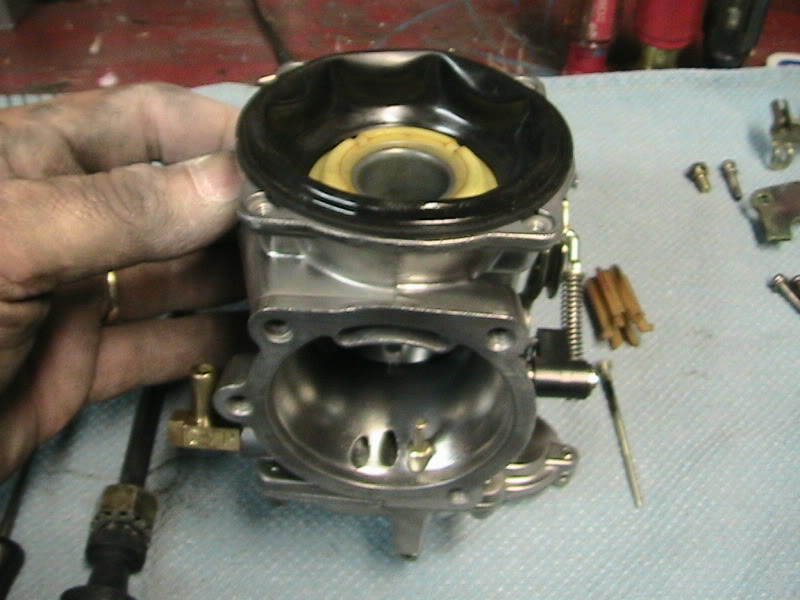 
__________________
__________________________________________
I
was born unlucky. My luck is so bad, if it was raining titties, I'd
get hit by a dick. ~ElGuapo~
2005
FLHTCI
Dice valve stem caps (gold), surely adding 10+
hps.
10 year A.M.A. member.
3 year PA ABATE
member.
RIP Rick Massey: AKA-Rubberdown. Godspeed, 02-02-12.
Last edited by Dave63; 03-27-2012 at 06:51
PM. |

|

|
 03-27-2012, 12:41 PM
 |
#6 (permalink)
|
|
Shake~N~Bake
Join Date: Jun 2008
Location: USA
Posts: 21,345
|
Install your main jet needle, the spring
seat and the spring. I used an XL needle for this build as it works
well with giving good midrange fuel with no bog. If your engine is
stock, install the needle (XL PT# 27094-88). FOr larger engines.
cammed engines, I use a .050" shim under the needle to add just a
touch more fuel. 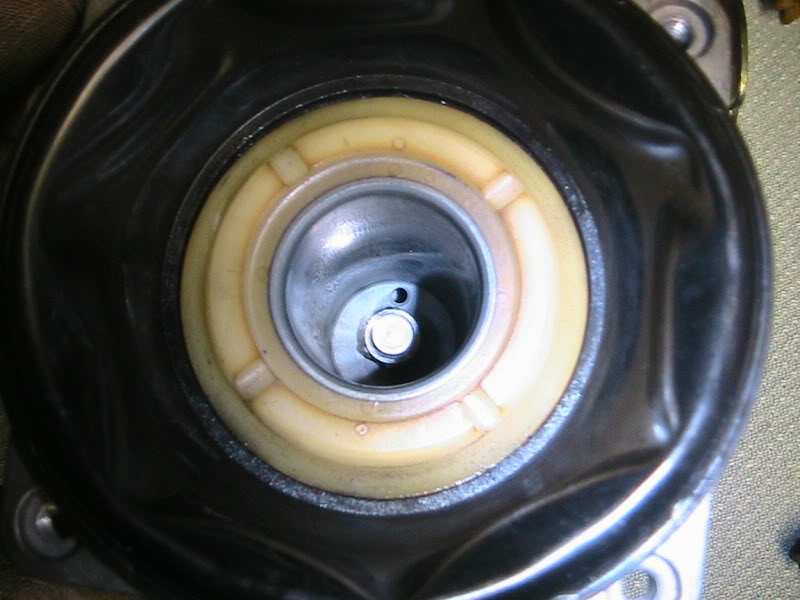 Can
be seen in throat, into main housing:  You
can either install a DynoJet spring which is shorter and a lighter
spring rate, (8.8 onces for 3" compression and 5" long VS stock
which is 12.5 onces for 3" compression and 5.5" long) a stock
spring, or take a stock spring, cut off 3 rings from it, and your
slide will react faster, giving similar results as the DynoJet
spring. Now that all your parts are inside the top of the
carb, the cover can go back on, sa can the right side cable
cradle. 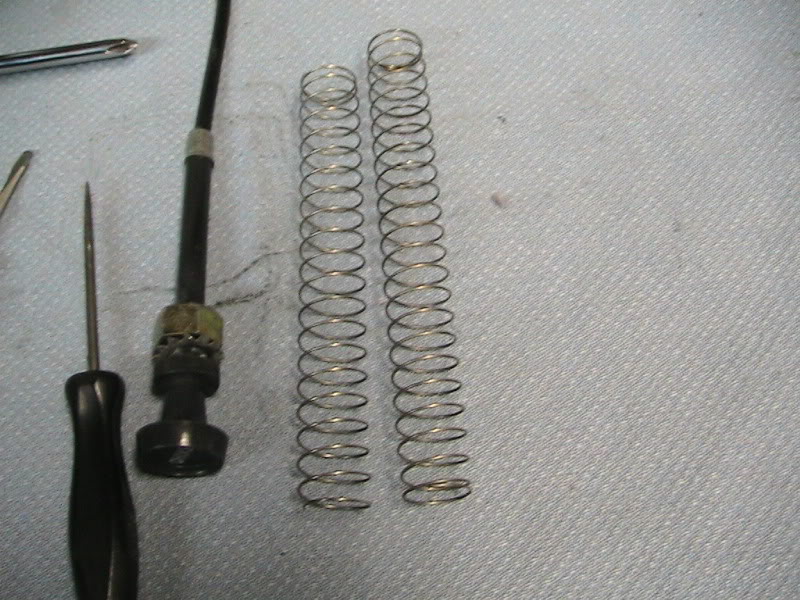
__________________
__________________________________________
I
was born unlucky. My luck is so bad, if it was raining titties, I'd
get hit by a dick. ~ElGuapo~
2005
FLHTCI
Dice valve stem caps (gold), surely adding 10+
hps.
10 year A.M.A. member.
3 year PA ABATE
member.
RIP Rick Massey: AKA-Rubberdown. Godspeed, 02-02-12.
Last edited by Dave63; 03-27-2012 at 06:52
PM. |

|

|
 03-27-2012, 12:46 PM
 |
#7 (permalink)
|
|
Shake~N~Bake
Join Date: Jun 2008
Location: USA
Posts: 21,345
|
__________________
__________________________________________
I
was born unlucky. My luck is so bad, if it was raining titties, I'd
get hit by a dick. ~ElGuapo~
2005
FLHTCI
Dice valve stem caps (gold), surely adding 10+
hps.
10 year A.M.A. member.
3 year PA ABATE
member.
RIP Rick Massey: AKA-Rubberdown. Godspeed, 02-02-12.
Last edited by Dave63; 03-29-2012 at 09:34
AM. |

|

|
 03-27-2012, 12:57 PM
 |
#8 (permalink)
|
|
Senior Member
Join Date: May 2011
Location: Arkansas
Posts: 1,197
|
OUTSTANDING, Dave!
Now I'm
REALLY glad you got that carb. Well documented, this ought to help a
lot of people out. Thanks for posting, man.
A LOT of gasoline
has gone through that carb. And now it looks better than new.
__________________
Ride In Peace, Rick "Rubberdown" Massey
|

|

|
 03-28-2012, 02:46 AM
 |
#9 (permalink)
|
|
Señor Member
Join Date: Oct 2007
Location: Veracruz, Ver. Mexico (I rarely take off my flack
jacket. ;-)
Posts: 1,686
|
Excellent Dave!  What's
the polishing process you use? __________________  Ride
Safe,  Vettster  Oil?
Right here is all you need to know about freakin oil: http://www.bobistheoilguy.com/motor-oil-101/Sent
from my old POS desktop computer cuz I'm too cheap to buy one of
those fancy new smart-fones. 
|

|

|
 03-28-2012, 04:44 AM
 |
#10 (permalink)
|
|
Use the Shwartz
Join Date: Mar 2011
Location: Noneya
Posts: 3,243
|
Quote:
Originally Posted by Vettster 
Excellent Dave!  What's
the polishing process you
use? | oh boy... you shoulda
never asked that! Trade secret  ..
back away from the windows and close the drapes... 
__________________
I'm tryin', Ringo. I'm tryin' real hard to be the
shepherd.
_______________________________
"Lead paint chips are chewy
and sweet..... "
~ Rubberdown
RIP Rick Massey:
AKA-Rubberdown. Godspeed, 02-02-12.
|

|

|
 |
|
 Posting Rules
 |
You may not post new threads
You may not post replies
You may not post attachments
You may not edit your posts
HTML code is Off
| |
|
|

